
Installation of ESP32 and ESP8266 Boards in Ubuntu using Arduino IDE
Go Arduino IDE->File->Preferences.
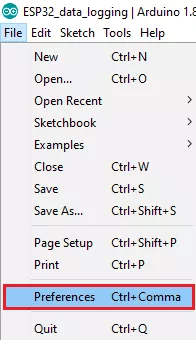
Enter the following links into the “Additional Board Manager URLs” field as shown in the figure below. Then, click the “OK” button:
ESP32: https://dl.espressif.com/dl/package_esp32_index.json
ESP8266:https://arduino.esp8266.com/stable/package_esp8266com_index.json
To use both ESP32 and ESP8266 boards at a time paste the below combined Json link :
After pasting the link in the “Additional Board Manager URLs” , press ok.

-
Now go to the Tools->Boards->Board Manager.
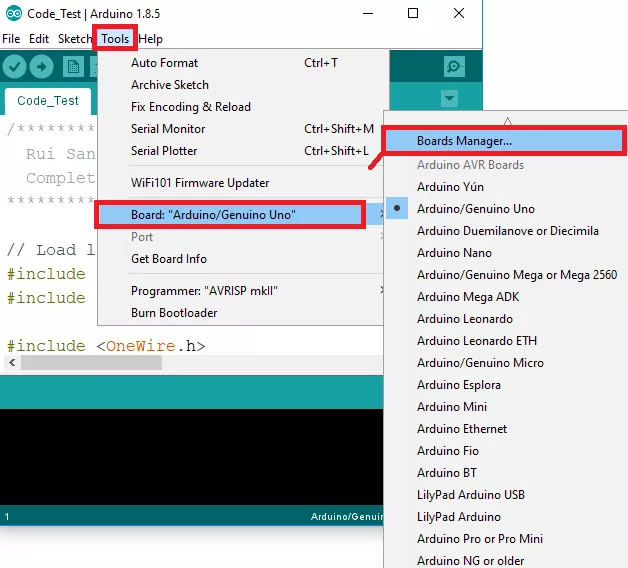
In the board’s Manager search for ‘esp32’ and Click on install
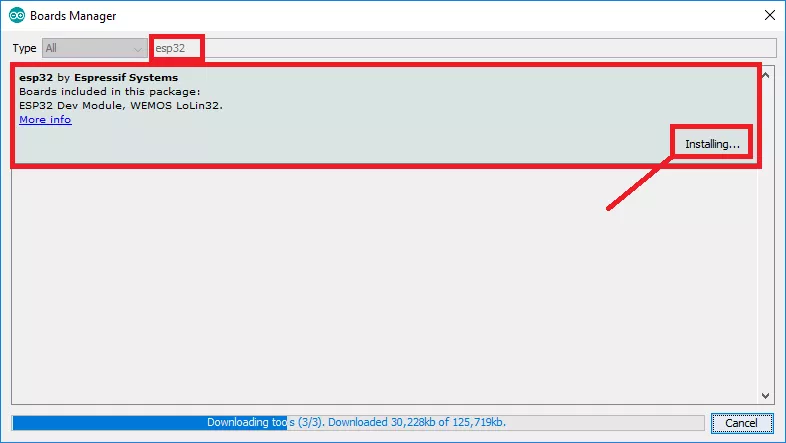
Note: It takes several minutes to install the esp32 Board depending on Internet Speed.
Testing the Installation
Plug the ESP32 board to your computer. With your Arduino IDE open, follow these steps:
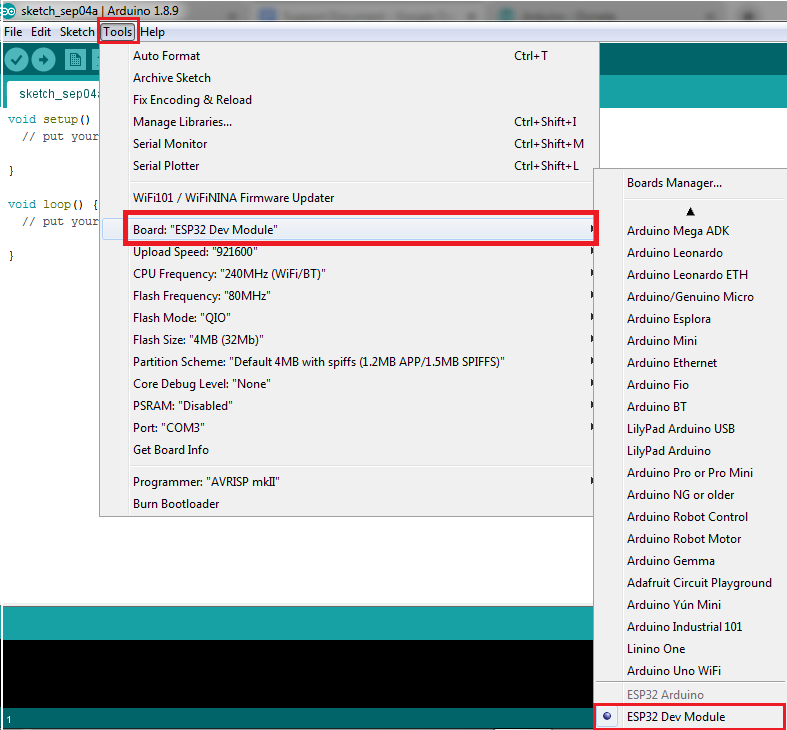
- After installation go to the Tools->Board->Esp32 Dev Module
- Select the Port (if you don’t see the COM Port in your Arduino IDE, you need to install the CP210x USB to UART Bridge VCP Drivers)
-
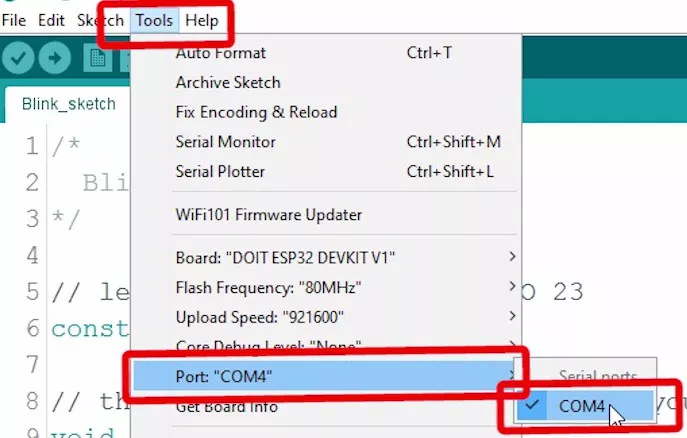
Now go to Tools->Port ‘COM4’/Port ‘COM3’-Enter.
-
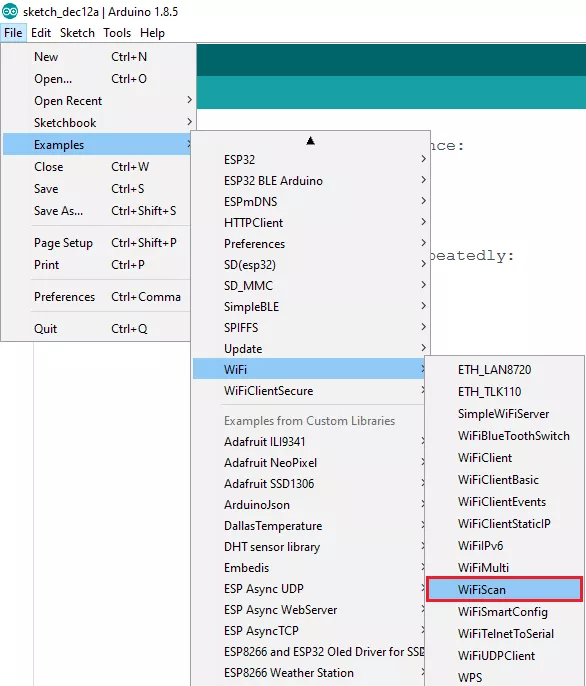
Open the following example under File > Examples > WiFi (ESP32) > WiFiScan-click ok.
-
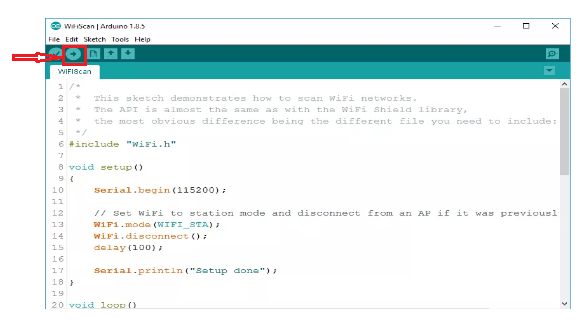
A new sketch opens in your Arduino IDE,
-
press the Upload button in the Arduino IDE. Wait a few seconds while the code compiles and uploads it to your board.
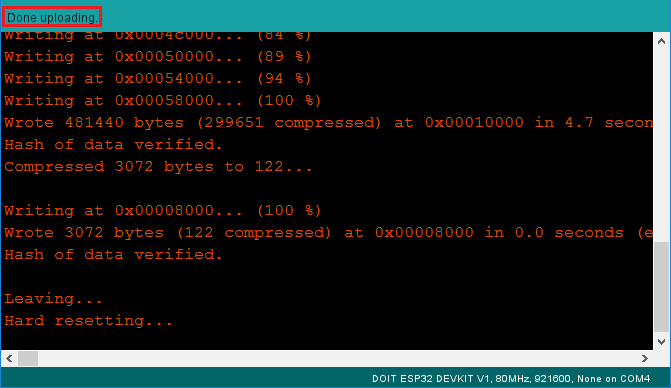
If everything went as expected, you should see “Done uploading.” message.
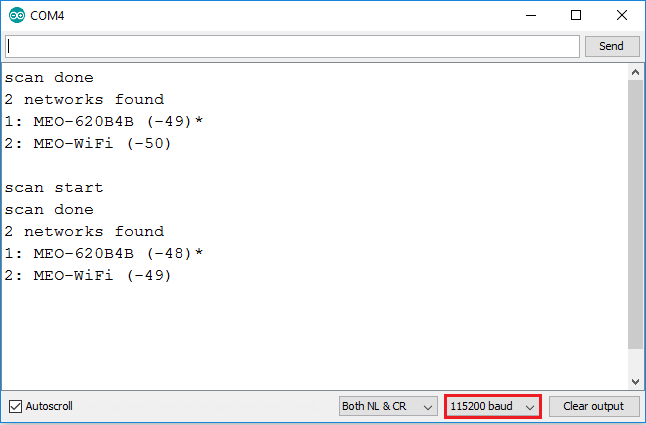
Open the Arduino IDE Serial Monitor at a baud rate of 115200:
Press the ESP32 on-board Enable button and you should see the networks available near your ESP32:
Common Error:
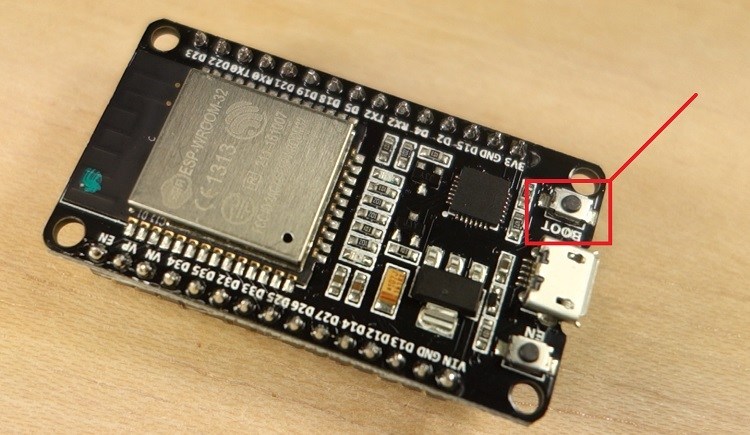
If you try to upload a new sketch to your ESP32 and you get this error message “A fatal error occurred: Failed to connect to ESP32: Timed out… Connecting…“. It means that your ESP32 is not in flashing/uploading mode.
-
Having the right board name and COM port selected, follow these steps:
-
Hold-down the “BOOT” button in your ESP32 board
-
Press the “Upload” button in the Arduino IDE to upload your sketch:
After you see the “Connecting….” message in your Arduino IDE, release the finger from the “BOOT” button
All comments